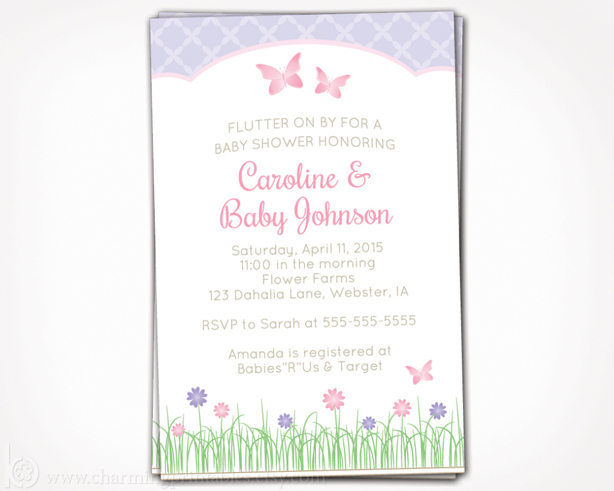
Decided to tweak my very popular garden & butterfly invitation design and offer it for baby showers! The soft, pastel pink and purple colors make this perfect for a Spring garden themed shower for a baby girl.

Printable Design & Decor
Decided to tweak my very popular garden & butterfly invitation design and offer it for baby showers! The soft, pastel pink and purple colors make this perfect for a Spring garden themed shower for a baby girl.
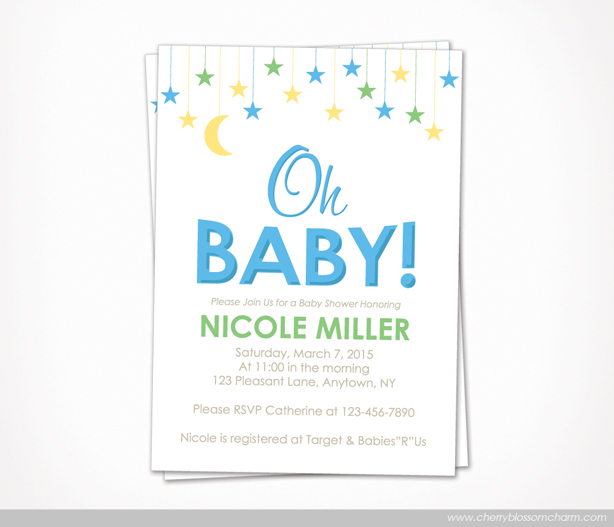
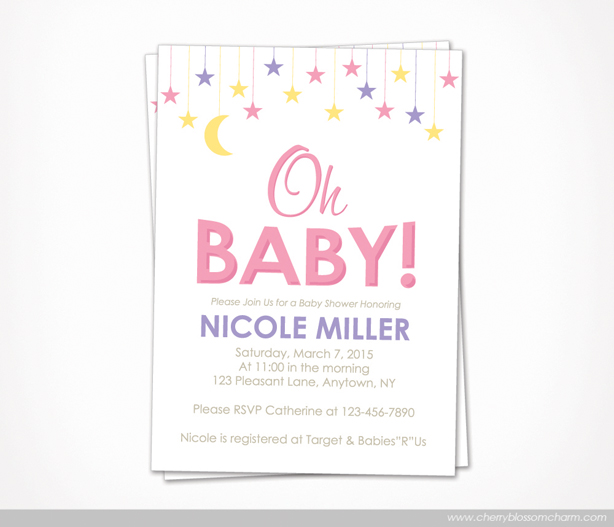
One of my favorite new products is this adorable “Oh Baby” invitation for a gender neutral baby shower! The fun and modern colors and neutral design make it perfect for any baby shower.
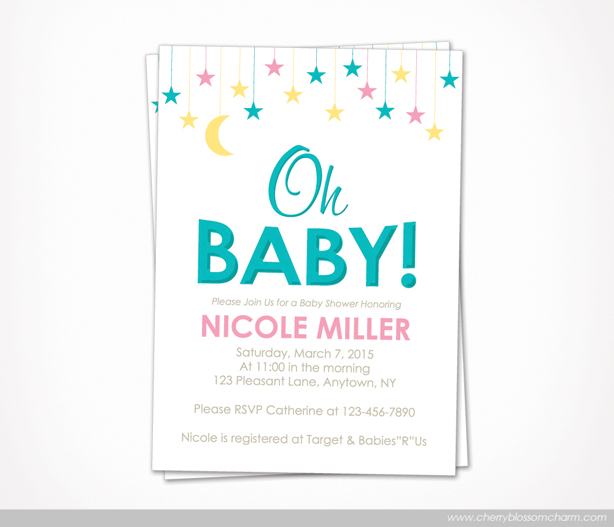
If you’d like to incorporate some different colors for the baby’s gender, I’m also offering it in a boy and girl version!
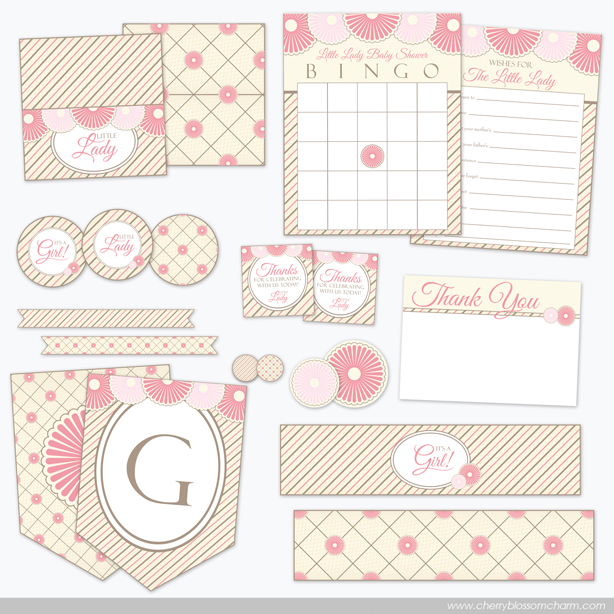
An updated version of my vintage inspired baby shower printables. I love the soft pinks and creams mixed with the floral and stripe patterns and lace background. This party package is ideal for any mom-to-be expecting a new little lady.
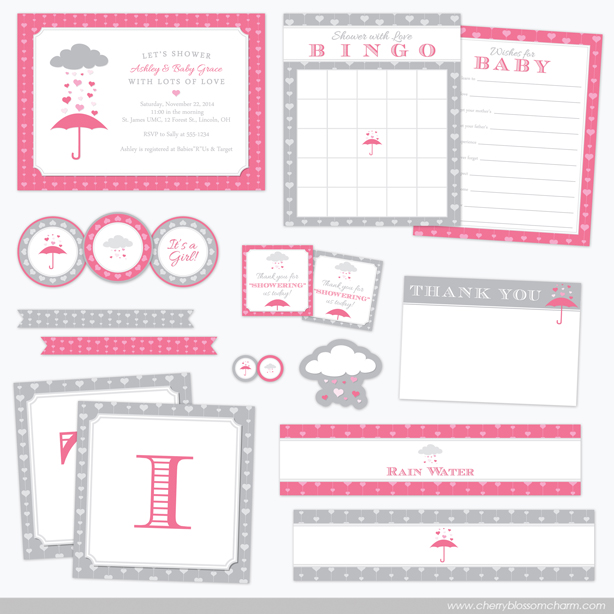
Just finished updating the design for my rain shower themed baby shower items so they’re now an instant download! Check out all of the girl, boy, and gender neutral items in this collection here.
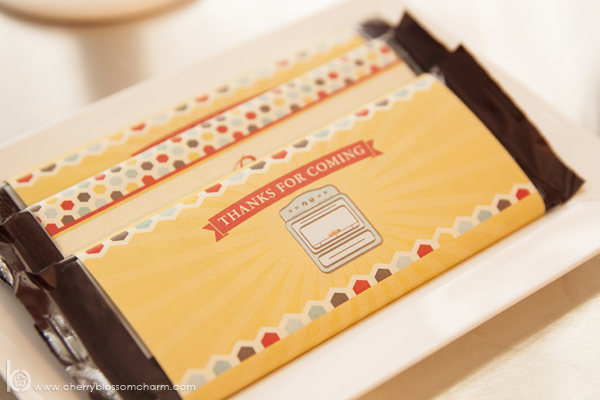
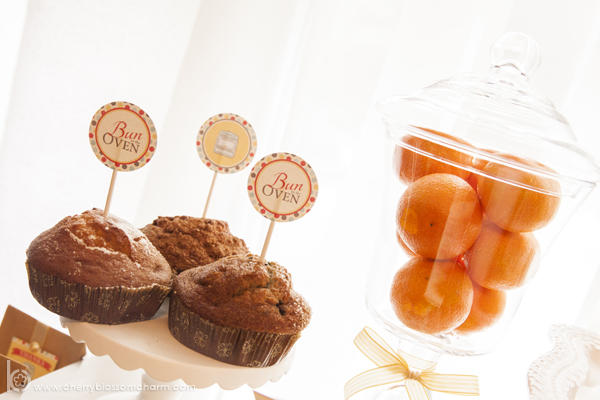
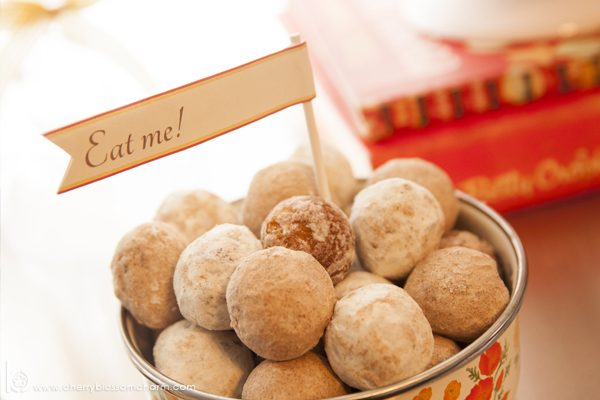
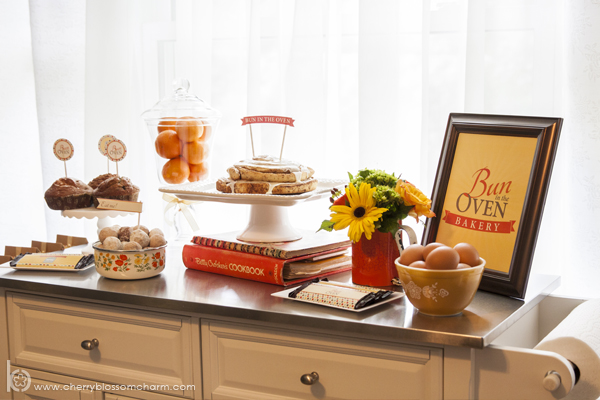
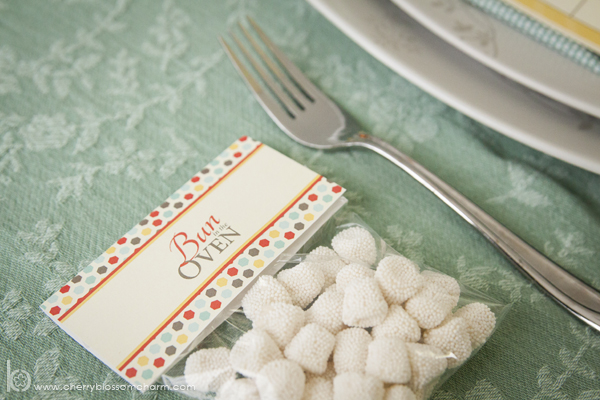
I’m in love with fun and unique themes for baby showers, so recently I had the idea to style a “Bun in the Oven” themed photo shoot. I wanted everything to feel “homey” and the style of the baby shower to be that of a retro kitchen. I started by designing the printables using a mint green, retro style oven, and to keep with the era, I also added a golden yellow and orange to the design. { The printables can be purchased here. :) }
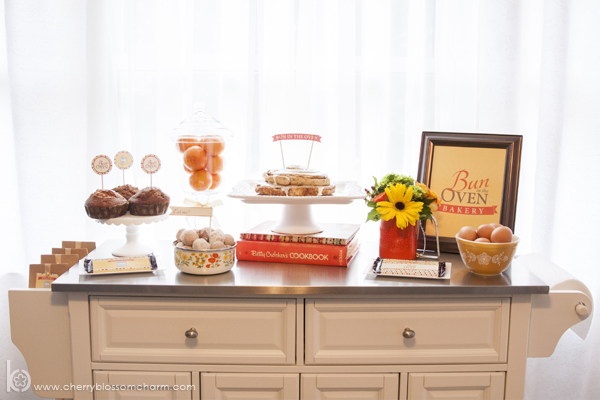
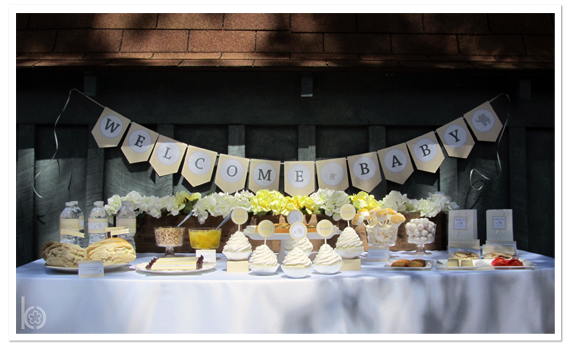
For the food, I thought it would be good to keep with the theme of baked goods because of the bun in the oven idea. I put a variety of fresh muffins (topped with “cupcake” toppers) on small cake stand, and added some donut holes to a retro bowl.
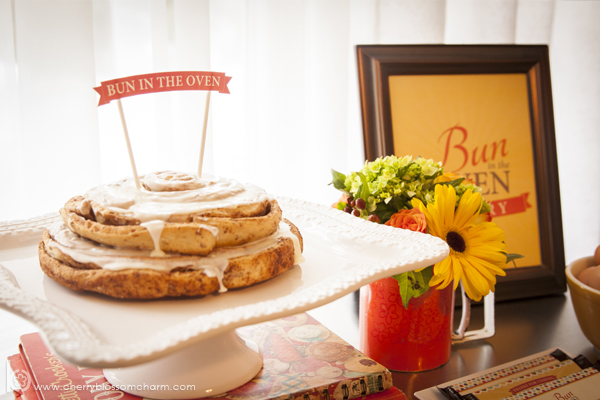
The centerpiece on the buffet was a homemade cinnamon bun cake, topped with a printable bun in the oven cake topper!
I also named the buffet the “Bun in the Oven Bakery” to stay within the theme. :)
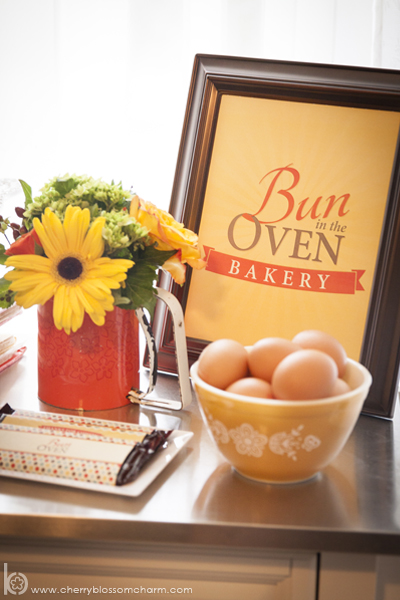
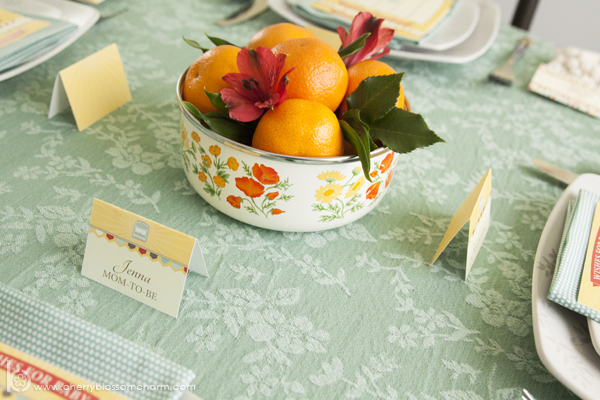
To keep with the retro kitchen theme, I used some dishes that were appropriate to that era. Fortunately for me, my mom had lots of amazing, retro cookware stored away in her kitchen. I used my mom’s amazing bowls to hold some of the food, and the old cookbooks were perfect for adding some height to my cinnamon bun cake. The final retro touch on the buffet was the orange 70s flour sifter, which worked perfectly for holding my floral arrangement.
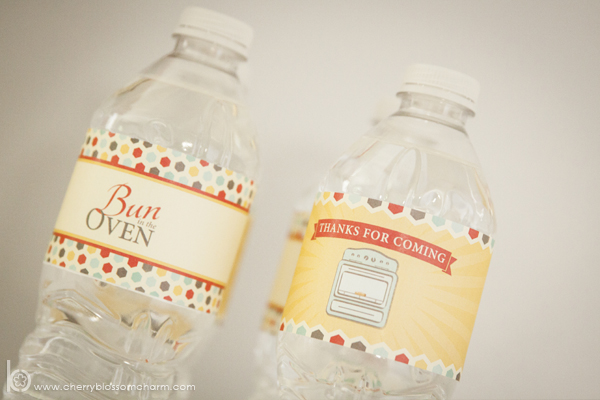
The drink bar featured a vintage milk glass bottle I found at an antique mall. I also included some orange soda and water bottles decorated with matching water bottle labels.
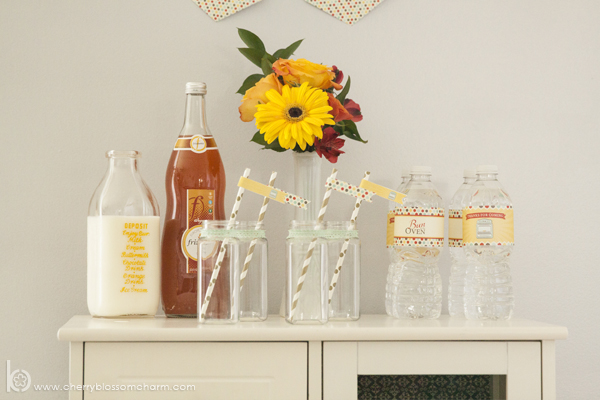
I used glue dots to attach some mint green lace to the drink bottles from The TomKat Studio. And the adorable paper straws from More Sprinkled Joy worked perfectly with my printable straw flags.

The guest table featured a beautiful mint green tablecloth, and each place setting included mint polka dot napkin and matching game cards. Guest’s seats were labeled with my printable place cards, and each guest received a treat bag filled with candy and topped with a matching printable bag topper.
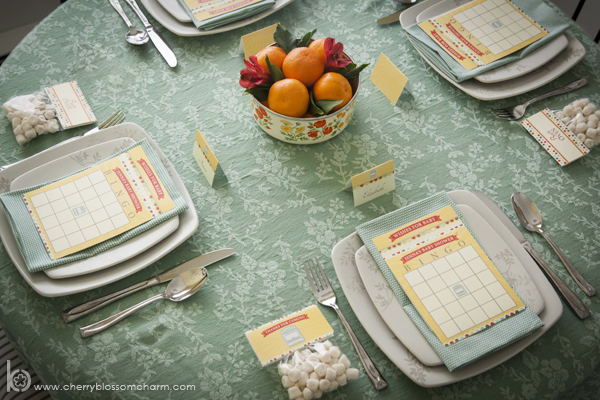
For the centerpiece, I added some oranges and a few flowers to one of the retro bowls.
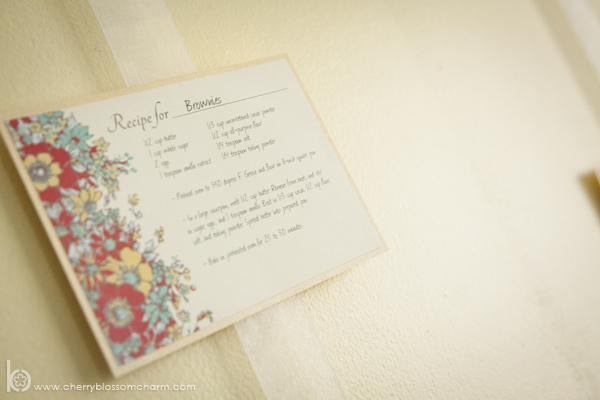
I made a backdrop for the table by hanging recipe cards, featuring recipes for baked goods, on some sheer ribbon using double sided tape. I think this idea would make a great backdrop for any baking themed party, and would be especially meaningful if you used some old, family recipes.
Priceless Studios Photography did an amazing job capturing every detail. I really enjoyed styling this photo shoot!
See the full gallery of photos from this shoot here. :)
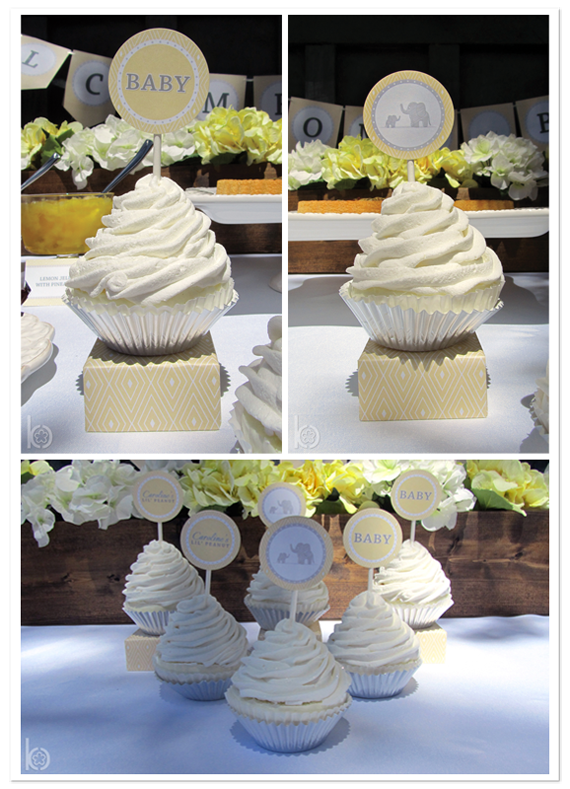
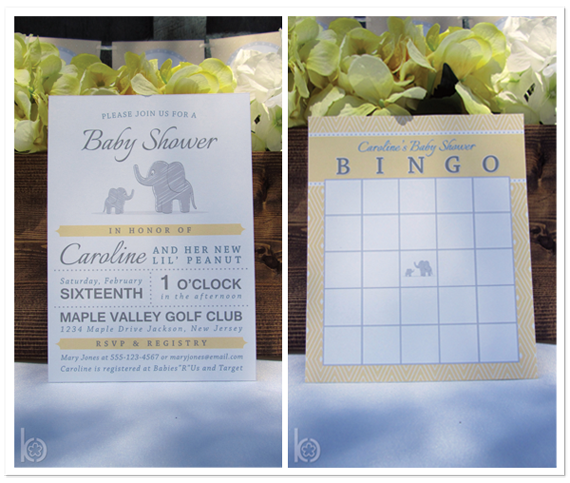
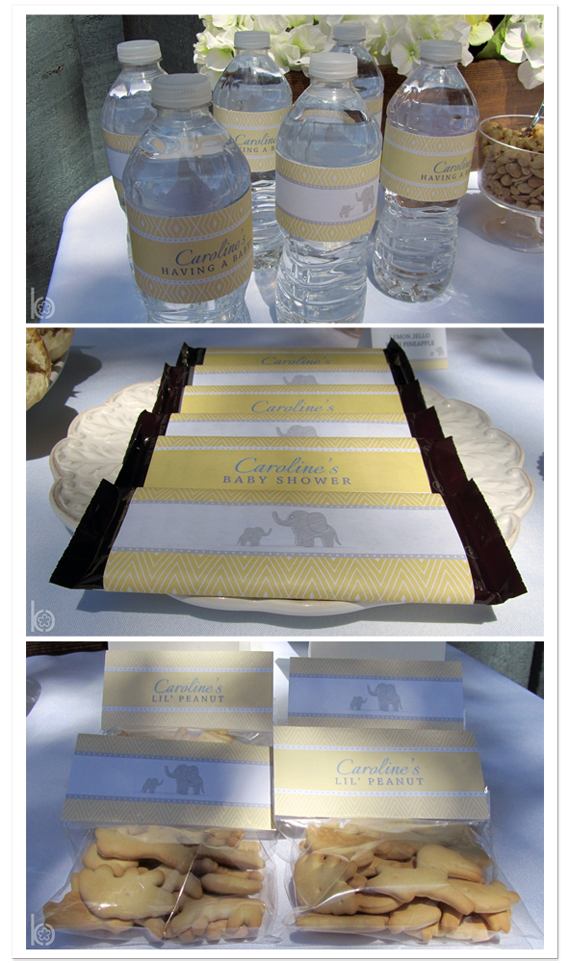
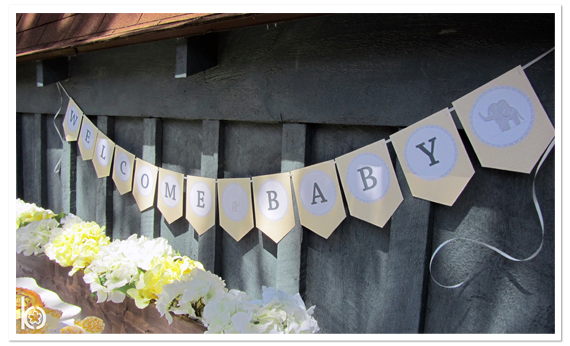
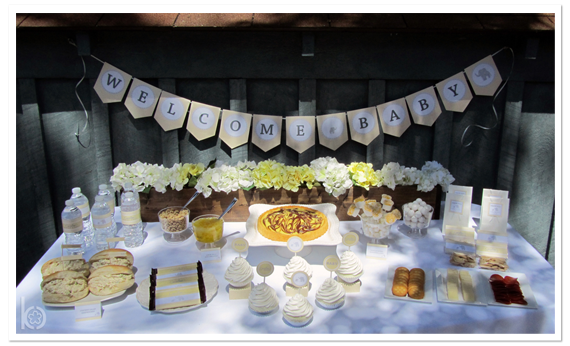
I am so excited to unveil my latest collection: The “Elegant Elephant” Collection. The soft yellow and gray color palette and elephant theme is perfect for a gender neutral baby shower. I love how these photos turned out against the blue shed, and I was so excited to use the amazing wood flower box my wonderful husband made!


This past weekend, my family held a baby shower for my older sister, Jenny. My mom, and my other sister, Steph, and I all helped to plan the décor/favors for the shower. Jenny wanted lots and lots of rubber ducks, so that’s what we gave her! Everyone loved how it came together, so I thought this would be a great time to share some photos from the shower, and some of our inspiration with you!
For the invitations, I really wanted to go with a “cute but elegant” look, so I custom designed these invitations for Jenny.

A few months before the shower I was looking up favor ideas for a rubber duck themed shower, and came across some suggestions like bubble bath, and bath soap. I thought these were great ideas to tie in our theme to the favors! My sister, Steph, took it one step further and created two different bath soaps: a yellow duck, and a turquoise bar soap to match the colors of the shower. She even scented them like baby powder! We used favor bags similar (only larger) to the ones found here, and I designed the tags to match the invitations. The turqouise favor bags and bar soap behind the yellow duck helped to give the duck the appearance of being in the water. We found the small, yellow container (I thought it look similar to a tub) at the Dollar Store, and it worked perfectly to hold the favor bags!

We added a few fun details to the buffet to ensure the food matched the theme of the event. My aunt created the punch by mixing Blue Hawaiian Punch, lemon-lime soda, and vanilla ice cream. My mom found the small ducks that we washed and allowed to float around the punch bowl.

My mom found a small cookie cutter shaped like a duck to cut out all the cheese. A fun way to eat cheese and crackers!

The cupcakes were baked by my mom in duck liners (found at Hobby Lobby), and my sister, Steph, and I frosted them to look like waves. My mom bought the yellow chocolate melts and melted them down in the microwave and put them into a duck mold, then placed them in the fridge to harden. The ducks were placed on top of the frosted cupcakes and put on a cupcake stand.

Rather than just putting the silverware out for people to take, I wanted it to have some style so I decorated an empty, plastic pretzel rod container to match the theme. {We used turquoise, plastic silverware wrapped with a yellow napkin. You can’t see it in the picture but I made napkin rings by wrapping ribbon around the rolled napkin and attached the ribbon to itself using a glue dot. I used two different ribbons, a turquoise polka dot, and a duck pattern, and alternated which ribbon I used on for each napkin ring.}

This container had a lot of grooves and places where the plastic stuck out at the top, so this is how I wrapped it:
What you’ll need:
Yarn
Plain Ribbon
Patterned Ribbon (smaller width than the plain ribbon)
Mod Podge
Foam Brush
Hot Glue
- Starting about ¾ the way up the container (where the bottom of the ribbon will be), apply a layer of Mod Podge with your foam brush about a 1/2 inch wide all the way around the container (don’t do too much at a time or it will dry before you get there).
- Wrap the yarn over the Mod Podge, pressing down and squeezing the rows of yarn together as you go.
- Once all the glue has been covered, apply another 1/2 inch wide strip of glue and continue applying the yarn over the glue.
- Continue this process until you get to the bottom of the jar, and then cut off the ribbon and tuck the end under a previous row so you can’t see it. (Try to be consistent about where you start and end the yarn on the container so you can keep the ends on the back)
- Using your thicker, plain ribbon, measure the jar and cut the ribbon so you have about an inch more than you’ll need.
- Remembering where the back of your jar is, put a dab of hot glue on the container, and press the end of the ribbon down until it dries.
- Wrap the ribbon around the jar and place another dab of hot glue on the ribbon that is already attached to the jar.
- Press down the other end of the ribbon until it dries. (You may need to lift the ribbon in a few places around the jar and add some extra hot glue so it doesn’t sag)
- Repeat this process with your thinner more decorative ribbon, centering it on the plain ribbon.
- Since the top of my jar had so many grooves, I had to apply the ribbon differently from how I did the bottom, wrapping and placing a dab of hot glue every few inches until the top was covered. If you have a more normal container that is flat, you can apply your yarn to the top in the same way you did the bottom.
Two of the games we played at the shower required guests to write, so I designed custom duck cards to match the rest of the paper products at the event.

P.S. If you’ve never played the “Dirty Diaper” Game (aka “Name That Candy Bar”), you have to consider planning it for your next baby shower. It’s a great, fun {and somewhat disgusting} baby shower game. :)
After debating about the centerpiece for awhile, my mom came across the idea of doing a diaper cake. Like everything else at the shower, we wanted to keep it cute but elegant at the same time, so we decided to match the theme of the shower, rather than using lots of pacifiers, rattles, etc. My mom and I created the diaper cake together, and we were so thrilled with how it turned out!

I made the banner by creating a template for all the shapes and letters on my computer, printing and cutting out each template, tracing them onto scrapbook paper, and cutting them out. It took a long time to do all that cutting, but it was definitely worth it in the end!


Have an event you’d like us to feature on our blog? Feel free to submit photos and information to info@cherryblossomcharm.com :)